

After 10 or so years, I decided to get back in to the development game for some personal projects and side gigs. As an electrical computer engineer, I had learned coding skills in languages such as C, C++, binary, and javascript. This is going on 20 years or so since those days.
In my early career, we used ASP.NET connected to Oracle databases. I will admit that the drag and drop functionality back then was amazingly simple. However, the front end design looked like a boring Access 97 Application and every clunky post-back was messy and not up to today’s Web 2.0 standards.
To get with modern times, I decided I was going to develop PHP web applications connecting to a MySQL database using all these new fancy CSS and HTML5 tricks. I had long since ditched my PC for a Mac, and have become quite immersed in the entire Mac Ecosystem (iMac, MacBookPro, iPhone, iPad, AppleWatch, HomeKit Devices, etc).
I figured this would be an easy tasks as Macs are based on a distribution of Linux and I’m quite comfortable using the Terminal. I also couldn’t possibly be the only person on the planet trying to do this. Boy was I in for a surprise. It took me at least 3 days, countless google searches, and a few embarrassing help posts before I was able to get everything I needed working, to work.
I was surprised that there was not a single blog post that listed a complete setup set of instructions for this. So I decided I would create one. Keep in mind, I am no expert, and perhaps those that are intimately familiar with this will have better suggestions, but below describes how to setup your Mac, running OSX Catalina v10.15.2, as a complete PHP development machine. This is what worked for me. I’ll cover setting up Apache, PHP, Xdebug, XCode, Eclipse, and MySQL. The goal is to get you up and running from nothing to a complete setup ready to code on your machine.
As a side note, I also connected my Eclipse to GitHUB and a project there. I will not get in to those details as there are plenty of how-to’s out there for this.
Let’s get started….
Step 1 – Clear everything out
My Mac is a few years old, and had been updated from Mac OSx Yosemite to Catalina. Additionally, maybe about 2 or 3 years ago I had a similar itch and installed all kinds of tools (Apache, PHP, Eclipse, etc). This simply meant I had a mish-mash of outdated tools and none of them worked and they were all competing with auto-installed updates. If that’s you as well, I recommend removing everything. Uninstall Apache, uninstall PHP, remove MySQL, etc. As I don’t know exactly what you have installed, I can’t give you specific instructions here. I can offer this: if you have any of the following installed, remove it:
- Apache (Macs come with a version of this)
- PHP (Macs also come with a version of this)
- Homebrew
- MySQL
- Xdebug
- Eclipse
Step 2 – Install Prerequisite Software
First make sure you have the Xcode command line tools installed. Open a terminal window and type the following command:
$ xcode-select --install
It may error out and tell you Xcode is already installed and to run the software updater. If you get this message, it means that the Command Line tools were installed as part of XCode via the App Store ![]() . Please make sure you have no software updates available and if so download and install them now.
. Please make sure you have no software updates available and if so download and install them now.
Next, install Homebrew, a nice MacOS package manager:
$ /usr/bin/ruby -e "$(curl -fsSL https://raw.githubusercontent.com/Homebrew/install/master/install)"
Now use Homebrew to install some Catalina libraries that are needed:
$ brew install openldap libiconv
Do some Homebrew cleanup and ensure that PHP is not installed:
$ brew update
$ brew upgrade
$ brew cleanup
$ brew list | grep php
If the last command returns anything, then use the following command to uninstall that version of PHP (e.g. if it returned php72):
$ brew uninstall --force php72
Clean out any old PHP installation files:
$ rm -Rf /usr/local/etc/php/*
If it returned nothing, you are good to go on to Step 3.
Step 3 – Install Apache
We will use Apache as the WebServer on our Mac. If you already have the built-in Apache running (or didn’t uninstall it from Step 1), it will need to be shutdown first, and any auto-loading scripts removed:
$ sudo apachectl stop
$ sudo launchctl unload -w /System/Library/LaunchDaemons/org.apache.httpd.plist 2>/dev/null
Use Homebrew to install Apache:
$ brew install httpd
And now setup Apache to autostart:
$ sudo brew services start httpd
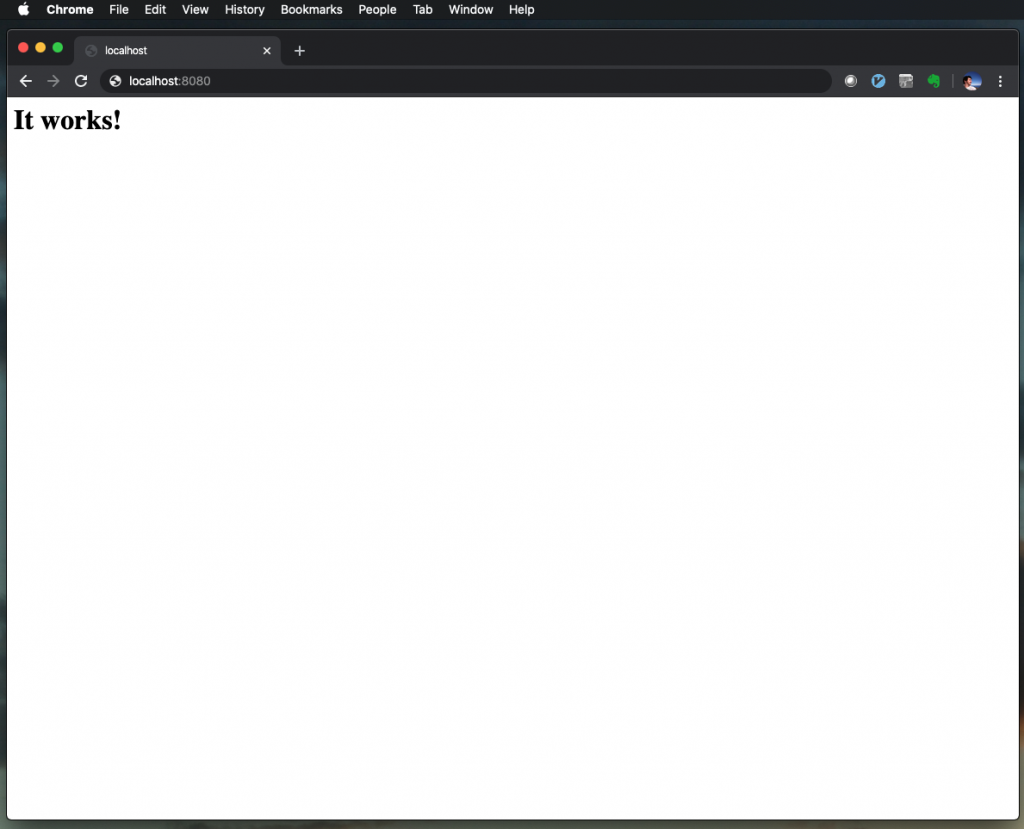
You should now be able to open your favorite browser, and navigate to http://localhost:8080 and see an “It Works!” Message:
Step 4 – Configure Apache
Now that Apache is installed, there is some settings you can configure to enable it run well for your development setup.
Using your favorite text editor, open /usr/local/etc/httpd/httpd.conf – don’t forget to use sudo in front of whatever command you use to edit the file, e.g.:
$ sudo nano /usr/local/etc/httpd/httpd.conf
First off, I want my local webserver to serve sites off of the default web port of 80, like it would on the internet. Find the line that says Listen 8080 and change it to Listen 80.
If you want, you can change the default directory of where you serve your websites from. Search for the term DocumentRoot and change the value to where you want. I used:
/Library/WebServer/Documents
You can put it anywhere you like (such as /users/your_user/Sites/ for example).
You also need to change the tag reference right below the DocumentRoot line. This should also be changed to point to your new document root:
/Library/WebServer/Documents
In that same block you will find an AllowOverride setting, this should be changed to:
# AllowOverride controls what directives may be placed in .htaccess files.
# It can be "All", "None", or any combination of the keywords:
#   AllowOverride FileInfo AuthConfig Limit
#
AllowOverride All
You should now enable mod_rewrite, which is commented out by default. Search for mod_rewrite.so and uncomment the line by removing the leading #:
LoadModule rewrite_module lib/httpd/modules/mod_rewrite.so
Next, change the user and group to match your currently logged/group in user (or the user that you will be doing your development in):
User your_user
Group staff
Change the ServerName value to localhost.
Save the file and exit back to the terminal. Next, restart Apache using the following command:
$ sudo apachectl -k restart
Step 4 – Install PHP
I installed PHP 7.2, even though it’s not the latest, simply because my hosting site and wordpress setup uses php 7.2 and I want to integrate my php application with my wordpress site at some point in the future. To install php, in your terminal window, use homebrew by entering the following:
$ brew install php@7.2
Note, if you want to install a different version, simply change the numbers after the @ (e.g. php@7.3 or php@7.4).
Once php is installed, we need to go to the httpd.conf file again and add a reference to the php module we just installed. Please note the path of the module, which should have been displayed after php was installed in the terminal window. Open the file and add the following line after the last LoadModule line we uncommented earlier:
LoadModule php7_module /usr/local/opt/php@7.2/lib/httpd/modules/libphp7.so
We also must set the Directory Indexes for PHP explicitly, so search for this block:
<IfModule dir_module>
    DirectoryIndex index.html
</IfModule>
..and replace it with this:
<IfModule dir_module>
    DirectoryIndex index.php index.html
</IfModule>

<FilesMatch \.php$>
    SetHandler application/x-httpd-php
</FilesMatch>
Save and exit the file, then restart apache again with the following:
$ sudo apachectl -k restart
To validate your PHP installation, create a simple PHP page in the folder you set for your sites. You can use the following command to do so (if you created your web directory under /users/your_user/Sites):
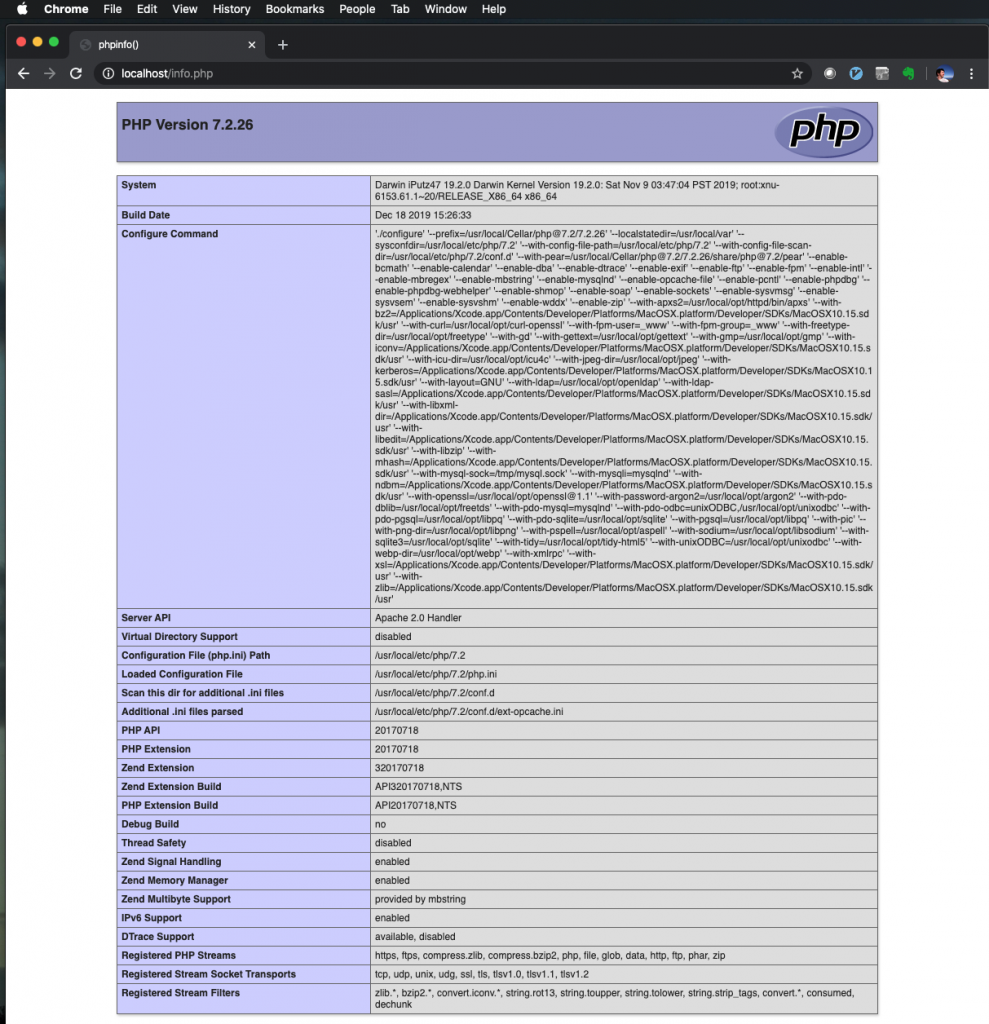
$ echo "<?php phpinfo();" > ~/Sites/info.php
Now point your browser to http://localhost/info.php and you should see the following PHP information page:
Homebrew should have added its preferred /usr/local/bin and /usr/local/sbin to your path as part of its installation process. Quickly test this by typing:
$ echo $PATH
/usr/local/bin:/usr/bin:/bin:/usr/sbin:/sbin:/Library/Apple/usr/bin:/Library/Apple/bin
If you don’t see this, you might need to add these manually to your path. Depending on the shell you’re using, you may need to add this line to ~/.profile, ~/.bash_profile, or ~/.zshrc:
$ export PATH=/usr/local/bin:/usr/local/sbin:$PATH
Step 5 – Install XDebug
Though not required, I find that having a debugger to help you run through your code is really helpful. XDebug is a great tool that can be used to help you step through your code, set breakpoints, etc. This is where I ran in to all kinds of issues on my machine due to Apple’s new security protocols called SIP. According to the XDebug install instructions, if you installed PHP and Apache with Homebrew all you should need to do is type the following:
$ pecl install xdebug
However, if the above command fails due to the phpize not returning the correct information, or it’s trying to write to folders it cannot, or it cannot find php.h, etc, as it did for me (the reason I wrote this post), try the following:
First, you need to make sure that the latest Xcode and the command line tools are installed. This should have been done in Step 2, but if you jumped right to this section, please make sure you check. Open a terminal window and run the following command to display the SDK path:
$ xcrun --show-sdk-path
It should return something like:
/Applications/Xcode.app/Contents/Developer/Platforms/MacOSX.platform/Developer/SDKs/MacOSX.sdk
If it doesn’t, install them using the command listed in Step 2.
Now create a new folder in your home folder for phpize:
$ mkdir ~/php-private/
And copy the following file to it:
$ cp /usr/bin/phpize ~/php-private/
Change directories to your new ~/php-private/ folder, open a text editor, and create a file called phpize-catalina.patch with the following patch code:
--- /usr/bin/phpize 2019-09-11 02:46:18.000000000 +0200
+++ ./phpize    2019-12-26 23:10:32.000000000 +0100
@@ -1,11 +1,12 @@
 #!/bin/sh

 # Variable declaration
+XCODE_SDK_ROOT=$(/usr/bin/xcrun --show-sdk-path)
 prefix='/usr'
 datarootdir='/usr/php'
 exec_prefix="`eval echo ${prefix}`"
 phpdir="`eval echo ${exec_prefix}/lib/php`/build"
-includedir="`eval echo ${prefix}/include`/php"
+includedir="`eval echo ${XCODE_SDK_ROOT}${prefix}/include`/php"
 builddir="`pwd`"
 SED="/usr/bin/sed"
Save and close your text editor, and now patch your copy of phpize by using the following command:
$ patch ~/php-private/phpize < phpize-catalina.patch
Next, download the latest source files for Xdebug, for me it was 2.9.0, using the following git command:
$ git clone git://github.com/xdebug/xdebug.git
That should have downloaded all the source files to the ~/xdebug/ path. Change directories to this path.
$ cd ~/xdebug
Now run the phpize file we patched:
$ ~/php-private/phpize
You should see the following output:
Configuring for:
PHP Api Version:         20180731
Zend Module Api No:      20180731
Zend Extension Api No:   320180731
If you receive the error:
Cannot find autoconf. Please check your autoconf installation and the $PHP_AUTOCONF environment variable. Then, rerun this script.
It means you do not have autoconf installed. Try:
$ brew install autoconf
Run the phpize command above again and validate you receive a similar output to that listed above. Once you do, configure the files for compilation:
./configure --with-php-config=/usr/local/opt/php@7.2/bin/php-config
Note, be sure you verify you are using the correct PHP install bin path (if you used Homebrew it should be in the path listed in the above command, if not, please use the correct path). Now build the extension:
$ make
And now install it:
$ make install
If all went smoothly, that command should output something like the following:
Installing shared extensions:     /usr/local/Cellar/php@7.2/7.2.26/pecl/20170718/

  +----------------------------------------------------------------------+
  |                                                                      |
  |   INSTALLATION INSTRUCTIONS                                          |
  |   =========================                                          |
  |                                                                      |
  |   See https://xdebug.org/install.php#configure-php for instructions  |
  |   on how to enable Xdebug for PHP.                                   |
  |                                                                      |
  |   Documentation is available online as well:                         |
  |   - A list of all settings:  https://xdebug.org/docs-settings.php    |
  |   - A list of all functions: https://xdebug.org/docs-functions.php   |
  |   - Profiling instructions:  https://xdebug.org/docs-profiling2.php  |
  |   - Remote debugging:        https://xdebug.org/docs-debugger.php    |
  |                                                                      |
  |                                                                      |
  |   NOTE: Please disregard the message                                 |
  |       You should add "extension=xdebug.so" to php.ini                |
  |   that is emitted by the PECL installer. This does not work for      |
  |   Xdebug.                                                            |
  |                                                                      |
  +----------------------------------------------------------------------+
Now you need to add the extension to your php.ini file. Use your favorite editor (don’t forget sudo) to modify /usr/local/etc/php/7.2/php.ini and add the following to the very bottom:
[xdebug]
zend_extension=/usr/local/Cellar/php@7.2/7.2.26/pecl/20170718/xdebug.so
xdebug.remote_enable=1
xdebug.remote_host=localhost
xdebug.remote_handler=dbgp
xdebug.remote_port=9000
Note, all you really need to add is the zend_extension line but in order to have it work with Eclipse I use the remote enabled flags along with the other settings listed there.
Finally, restart Apache:
$ sudo apachectl -k restart
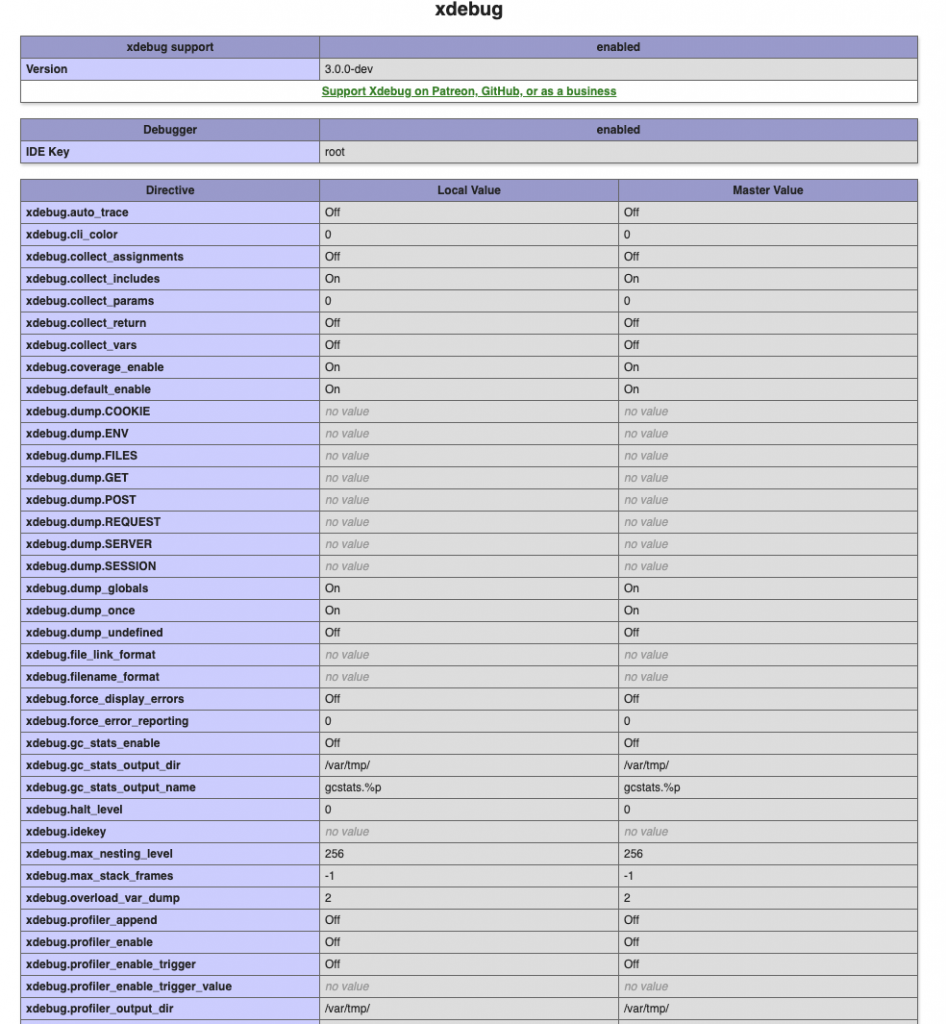
Back in your browser, refresh or reload the info.php file we created earlier and you should now see a section that looks something like:
Step 6 – Install Eclipse
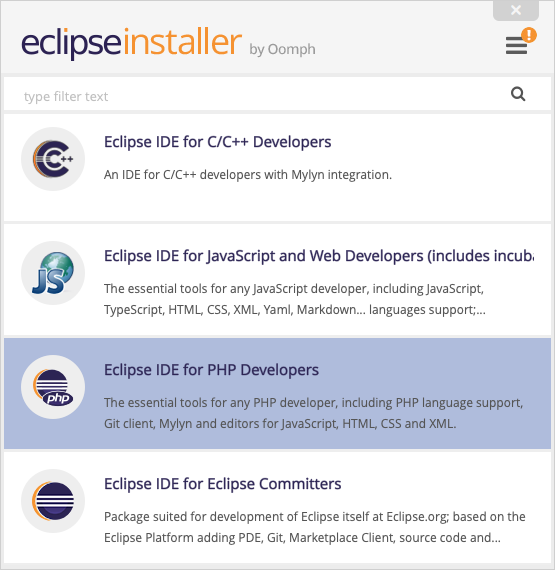
There are many great IDE’s out there. For whatever reason, I like to use Eclipse. Another good option is NetBeans. To install Eclipse, simply go to https://www.eclipse.org/downloads/ and download the 64bit installer.
Once the dmg file downloads, click it to open, accept any downloaded from the internet warnings, and load the installer. Scroll down until you see the “Eclipse IDE for PHP Developers”, and select it to install it:
Follow the on screen prompts to install Eclipse with the default settings.
Step 7 – Install MySQL
The last tool you may want to install for your PHP Development Setup is a database. I chose to install MySQL as it’s been around for a while and pretty easy to use. Again, there are other options out there, but I prefer to use MySQL for what I want to do.
Again, using Homebrew you can easily install MySQL. Back in your terminal window, type the following Homebrew command to download and install MySQL:
$ brew install mysql
If all goes well, you should see a confirmation and a few commands to run MySQL. I do a few things to secure my installation as well as ensure it autostarts when the computer reboots.
First, if you dont have it installed yet, install the Homebrew Services:
$ brew tap homebrew/services
Now load and start the MySQL Service:
$ brew services start mysql
This will ensure that the MySQL Server service starts at startup. Alternatively, you can launch the database whenever you want by running the following command (instead of running it as an auto loaded service):
$ mysql.server start
The next thing you’re going to want to do is secure your database. I do this by running the command:
$ mysql_secure_installation
Just follow the instructions to setup a root password. Please remember to write down this password and remember it. Forgetting this can lead to some headaches later on.
To test that it’s working properly, run the following command:
$ mysql -uroot -pYOURPASSWORD
This should open a command line interface of MySQL and log you in as the root user.
Summary
You should now be all set to start developing PHP applications on your Mac. Open up Eclipse, start a new PHP Project, and have fun.
I hope these steps were helpful. Again, it took me about three days of hunting around and running in to all kinds of problems before I was able to compile this list of steps to get everything working, so I thought it would be helpful to others to have this all listed in one place.
If I get some time, I’ll try to make a video of me duplicating these steps on my laptop and post it here so that you can see exactly what I am doing, and so you can see the screen results.
Until then, feel free to comment below any additional tips/tricks, or any questions. I can’t guarantee I’ll have an answer, but I can try.
Good luck!